Laptops | Cellphones | Camera | Gadgets

Gyaan Arena will keep you in pace with the new gadgets coming in the markets so that you keep an edge among your friends.

Apps | Games | Softwares

Gyaan Arena will let you know about the Apps you should use,Games you'll love and lots more stuffs with the softwares.

Gyaan Arena believes in Do-It-Yourself golden words

Gyaan Arena will provide you with the best of the walkthrough,tutorials,guide round the technology.

Innovation at its best

Technology is on move,so does your life.Know about the future life technologies coming or in use.

Tweaks | Tricks

You are a geek who loves pushing the limits.Gyaan arena will tell you a lot about these tricks and tweaks.

Showing posts with label Others_webdevelopment. Show all posts

August 25, 2012

Understand Website Terminology

You all have heard about websites and their ranking statistics reported by Alexa,Google and various other similar sites.But what is the criteria of ranking these websites ? Some would say its the Hits on the website,the other would stuck on the point of Page views. But what is it which is considered in calculations of web traffic? Today this post will make you familiar with the terms and their importance.

Hits

Hits is also known as request and it’s the total number of files loaded when a single page is requested from the web server. So how hits are calculated? For example – a single web page with 15 images (transparent.gif, header-background.gif, etc)is loaded, that’s 15 hits for starters. The web page has 10 photos (jammie.jpg, group-photo.jpg, etc), that’s another 10 hits. If you add up the CSS files, Javascript files and all the external files, each time a web page is loaded, it can easily build up more than 50 hits. If you clear cache, reload the page, another 50+ hits again.
Hits are rarely used to to judge a website’s traffic nowadays as they are not really accurate. The numbers are big and certainly cool, but generally useless.Measuring traffics in hits usually returns you a proudly large number.
Pageviews

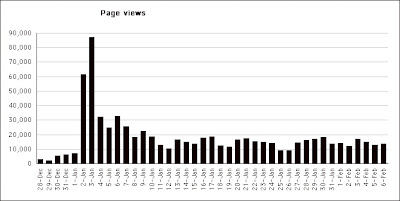
Pageviews is a calculation of how many times a page is viewed. Say a visitor lands on your main page, that’s 1 pageview. Same visitor clicks to About Us page, that’s another pageview. By dividing total pageviews with total unique visitors, you can get an idea how many pageviews each visitor generates.


Impressions

Impression is more or less a marketing term, normally calculated in bulk of 1000. It counts how many times a element (image, text, video) appears on a web page. If a advertisement network is paying $3/CPM (Cost Per Thousand Impressions), that means you are getting paid $3 when the banner appears 1000 times on your web page.

Visits / Unique Visitors

Visits is normally equivalent to unique visitors. Think of it as the number of different people (different IP) that visits your web page. Visits or unique visitors are the most essential numbers of all, when it comes to determine the traffic of a specific site.


August 23, 2012

Add Floating Twitter button on your Blogger

Floating Twitter button provides your reader a direct link to get connected to your twitter profile.It is a attractive widget which attracts your readers attention which may also results in increasing your followers.
So,this is the tutorial to get the same button on get the floating twitter button on your blogger website.


Here I have used fixed position property which floats with your scrolling.

Steps: 
  1. Open this link https://twitter.com/about/resources/buttons#follow and fill up your username and other settings as per your choice.
    On the right hand side,there appears a code which you have to copy and paste
    .
  2. Go to Blogger Dashboard > Design > Page Layout > Add A Gadget > HTML/Javascript.
  3. Paste the code below in the box 
    <div style="position: fixed; bottom: 20%; right:0px;border-radius:4px">
  4. Now just after the above code, paste the code from the twitter and write </div> after the code.
  5. It should look like this as shown in the picture.
    Incase you are having problem in implementing the above steps,comment below.

February 26, 2012

Creating a 'Send this to twitter' button

Let me show you how you can simply create a button for your WordPress blog to post the article you're reading on twitter as an update.
It's going to be a simple cake walk as you don't have to do anything special.All you need to do is to simply copy and paste the code below on your single.php file, within the loop:
<a href="http://twitter.com/home?status=Currently reading <?php the_permalink(); ?>
" title="Click to send this page to Twitter!"target="_blank">Share on Twitter</a>

Now check it out on yours ! Happy Posting !

July 26, 2010

Tutorial: How to create flash drop down menus and site navigation...

How to create flash drop down menus and website navigation (tutorial.)

If you are like me, always on a hectic schedule between deadlines, you will love In this tutorial. I am going to demonstrate you the fastest and easiest way to create professional navigation for your websites. Even if you are experienced flash/actionscript author, there is no point on spending hours tweaking and modifying your design when you can do it in just minutes.

I will present you Flash Menu Factory (FMF for short) is a valuable tool, but almost kept secret among web designers. FMF simplifies the design of flash menus a lot. It also offers many other site-navigation features like the creation of tabs, web buttons, sidebars, sitemaps and more. In this tutorial I will only focus in the creation of a simple website menu.

1. Start FMF

Click on the FMF Shortcut on your desktop. The main screen of the software will look something like this:


2. Create the menu structure

FMF displays your menu structure in the following area:


Start creating your menu items by clicking the "Add item" or "Add sub-item" buttons. As you make changes to your menu, they appear immediately in the "Menu Preview Window."

3. Add your page links and description text

Edit your menu item’s Text by filling the corresponding blanks in the "Menu Item Properties" window.

4. Select your menu's appearance

Select one of the available "skins" (pre-made menu designs)from the "Skin browser" window:


5. Save it. You are done!

Now you can save your menu in flash format: Click on the "Export" icon.Do not forget to save your menu in FMF format as well, using the "Save" icon.And really thats all about it! Now compare this the manual, tedious process of creating navigation in Adobe Flash. And if your client required some change in the menu structure, or appearance it it can be done literally in seconds.

Of course, there are dozens of options to customize your menu, adding sound effects, creating buttons, sidebars, tabs etc, but those are beyond the scope of this tutorial. You will find more information at www.flashmenufactory.com

I hope you found this tutorial useful!